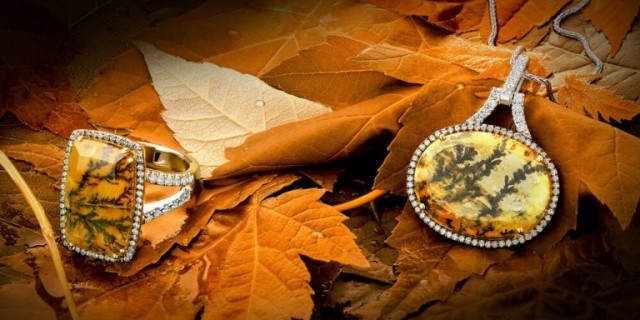
This page provides simple and practical tips for jewellery photography, allowing jewellers to focus on other important aspects of their business
(Isstories Editorial):- Montreal, Quebec Jan 8, 2024 (Issuewire.com) – Impressionphotography – Jewellery photography is a challenging skill due to the reflective nature of gems and small pieces and the potential for colours to appear less vibrant in photos. Issues like emeralds appearing as tourmaline or tanzanite appearing like amethyst can lead to dissatisfaction among jewelers. This page provides simple and practical tips for jewellery photography, allowing jewellers to focus on other important aspects of their business. By understanding these challenges, jewellers can improve their photography skills and enhance their business.
More on Isstories:
- Storm Pro Solution Extends Support to Nebraskans Affected by Recent Tornad
- Young Musical Virtuosos from 14 Nations Mesmerize at 2024 Grand Metropolitan International Music Competition Finals
- Book Launched “Sales me Safalta ke Gupt Siddhant” in Hindi Language on Sales Management
- Let’s Visit America on This Summer with US VISA Online
- Time to Visit America with the Help of USA Online Visa
Table of Contents
- What jewellery photography equipment do you need?
- Which camera and lens are best for jewellery photography?
- What Camera Settings Should You Use for Jewellery Photography?
- What Is the Best Lighting Setup for Jewellery Photography?
- What Are Some Social Media Jewellery Photography Tips?
- Conclusion
What jewellery photography equipment do you need?
In today’s visual world, quality product images are crucial for jewellery inventory preparation. These images are the first point of contact with customers, and if they are not attractive within 7 to 8 seconds, they are gone. About a third of consumers prefer quality images and believe they significantly influence purchasing decisions. First, gather the jewellery photography Montreal equipment and props listed below.
- Lenses and cameras
- The tripod
- Lighting sources (ensure they have the same colour temperature)
- A working table where you can level your lighting sources and jewellery products.
- Jewellery holder
- Using wax to prop up the ring during the photo shoot
- A lightbox or light tent can be used to create soft lighting.
- As reflectors and/or diffuser panels, a roll of pure white paper, foam boards, or fabric. Matte vinyl backdrops are another option.
- To achieve proper exposure, use a grey card.
- Other props you may require if you decide to be more creative with your social media posts.
Which camera and lens are best for jewellery photography?
Jewellers often inquire about the best camera and lens for jewellery photography, but there is no one-size-fits-all solution. Different pieces of equipment can yield impressive results. Focus on understanding your needs and selecting the camera that best suits them. A macro lens is crucial for close-up shots of intricate jewellery pieces, with the 18-55mm macro lens being the best choice. The choice depends on your specific needs and the quality of your jewellery.
What Camera Settings Should You Use for Jewellery Photography?
- If you’re a beginner who wants to use a DSLR to photograph jewellery for sale on sites like Etsy, Amazon, and eBay, you can start by following the configurations below.
- Understand your camera’s functions and become acquainted with its various knobs and buttons. You should be able to switch from auto to manual and aperture mode without too much difficulty.
- Adjust camera settings in aperture mode, starting with F14 and ISO 100. Adjust f-stops for sharper focus and shutter speed, adjusting based on the subject and desired outcome.
- After you’ve finished adjusting these settings, make a note of the shutter speed setting and test it by taking a photograph. If the jewellery image is darker and the colours are off, switch to manual mode; otherwise, you’re finished with camera setups.
- Adjust the aperture and shutter speed in manual mode to achieve the desired brightness or darkness in jewellery images.
- Adjust settings for jewellery photos, focusing on aperture, ISO, and shutter speed for good exposure, which will help set up lighting techniques for your photoshoot.
Remember that camera settings may differ depending on your working environment and subject. Don’t be afraid to experiment and try as many settings as you can until you find the perfect formula for your photography needs.
What Is the Best Lighting Setup for Jewellery Photography?
You can use the following lighting setup ideas for your next jewellery photoshoot:
- Lighting on the back and sides
The process of lighting your jewellery from behind is known as backlighting. This is an excellent jewellery photography setup for lighting glass-like jewellery pieces because it produces a crystal-clear product with a defined shape. Side lighting, on the other hand, gives your pieces a three-dimensional appearance. This method is appropriate for avoiding boring jewellery images.
- Natural illumination
Natural lighting is an efficient method for distributing light, but it requires time and careful scheduling. The ‘magic hour’ is the first hour after sunrise and the last hour before sunset, creating a diffused light ideal for jewellery photography. Avoid direct midday sunlight for poor results. Some gemstones, like sapphire, may appear more appealing under clear blue skies.
- Gentle Lighting: Making Use of a Lightbox
A DIY lightbox is possibly the most cost-effective option; however, creating your own may be time-consuming, and not everyone, especially business owners, has the luxury of time. As a result, to save time, we recommend purchasing a pre-made lightbox. It’s also useful if you’re going to photograph jewellery regularly.
What Are Some Social Media Jewellery Photography Tips?
Digital connectivity improves information consumption and shopping habits. Visuals influence purchasing decisions, so use professional-quality jewellery product images on social media to entice customers. Here are some eye-catching jewellery photography ideas for your social media pages.
- Capture different perspectives, and don’t be afraid to introduce new perspectives to your potential customers. Thinking creatively creative jewellery photography can sometimes revitalize the appearance of your jewellery products.
- Crop in a unique way. Crop your jewellery photo for the sake of fitting it into the format. Think outside the box and be open to extreme cropping. This can make your jewellery look more appealing.
- Use the rule of thirds. The Rule of Thirds is a crucial photography technique for creating visually appealing images by breaking shots into nine parts and aligning the focus point.
- Take in-context photos to show potential customers how your product fits into their lifestyle. Tell a story with images to make them realize they need your product, and they’ll be more likely to buy it.
- Finally, promote your ad.
Conclusion
Jewellery photography is a challenging process, but it’s not impossible. It’s essential to understand the purpose and action plan for achieving the desired results. Choosing appropriate equipment and post-production is recommended for both online and printed photographs, especially for B2C. B2B businesses often desire consistency and revise old images, so it’s best to start with accuracy. Consistent practice and a brave heart are keys to success. So, get your camera ready and sparkle on!
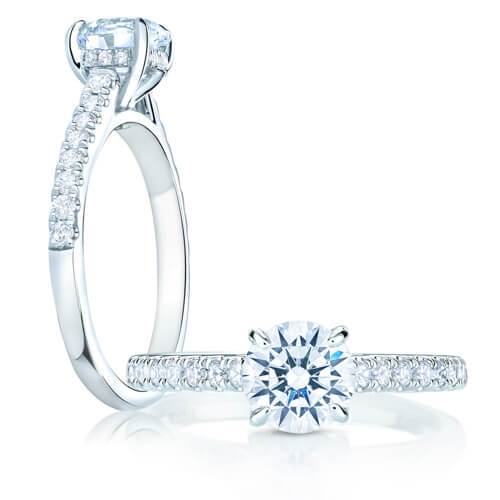
Based in Montreal, Canada, Impression Photography is your best option for jewellery photography, with a team of skilled professional photographers producing high-quality product images. We also charge the best jewellery photography prices.
Impressionphotography
[email protected]
09911816361
765 de l’Épée, Montreal, QC, H2V 3V1, Canada
https://www.impressionphotography.ca/
This article was originally published by IssueWire. Read the original article here.

